Cue the confetti, unicorns, rainbows, and happy bloggers! I’ve just discovered that two of my favorite things can be combined – Pinterest and Stock Photography. Yes, tis true! Today, I wanted to talk to you guys about how to use stock photos on Pinterest. Sure, we use styled stock photography to create graphics that we then pin to Pinterest, but there is another way to incorporate your stock photos onto Pinterest – by updating your Pinterest board covers! Read on…
Why Update your Pinterest Board Covers?
Your Pinterest Board Covers should have a cohesive flow that reflects your brand. By customizing your Pinterest profile to reflect your branding, you’re not just becoming more recognizable, but you’re creating a space that’s inviting and has a sense of order. I cannot express enough how important this is. Your account’s first impression depends on your board covers. So much pressure for sweet Pinterest boards, huh?! When you don’t have custom Pinterest board covers, your profile can look too busy and even messy. By simply creating images for your board covers you can create an atmosphere that is welcoming, cool, calm, and collected. Also, viewers are more likely to stick around and follow your account if it is organized and easy to navigate.
Let’s take a look at what I’m talking about…
Here is a screenshot of my current Pinterest board covers. Before I updated them with Haute Chocolate Styled Stock Photography, my account was “pretty” and “branded” but it could have been better – a lot better. I’ve never been a fan of fonts and text showing on board covers and I desperately wanted to find a way around that. Enter – Styled Stock Photgraphy to the rescue again!

So, how do you use stock photography to change your board covers to better represent your brand?
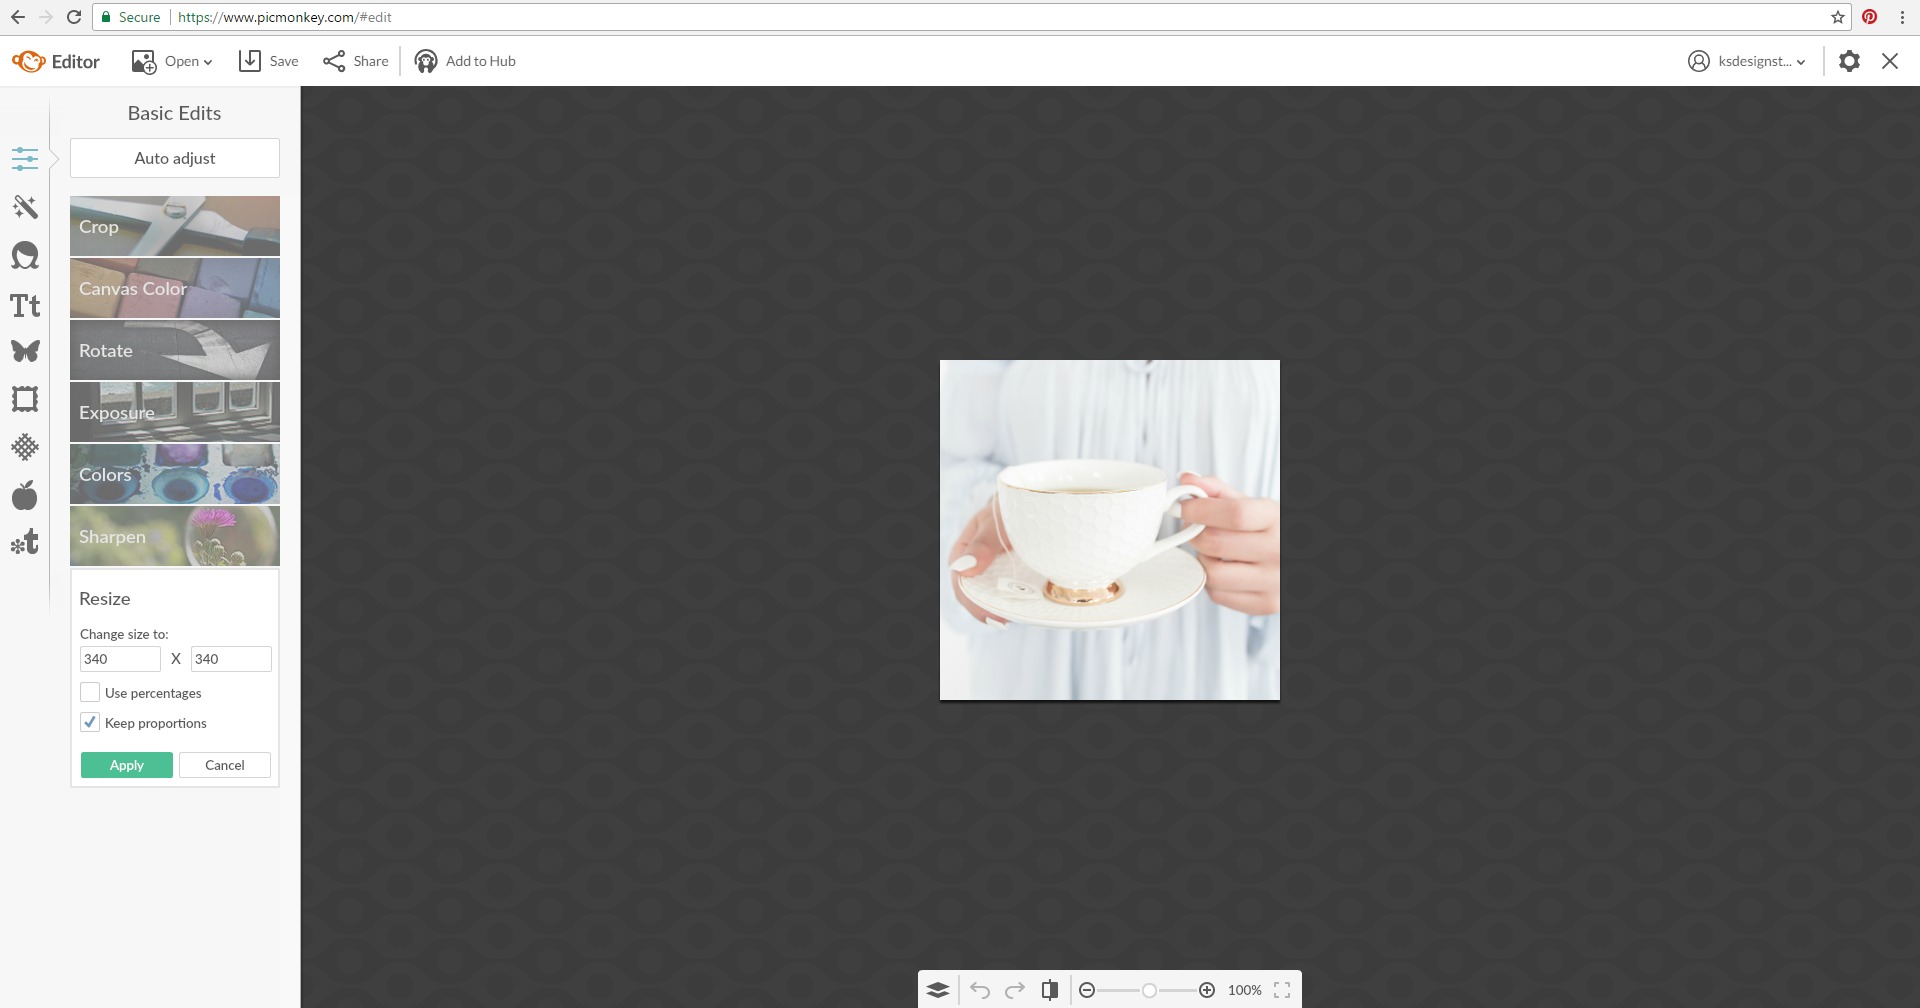
Pinterest board covers are now a square shape. I recommend creating them in a size of 340 x 340. There’s two ways of going about changing your Pinterest board covers.
Option 1: Upload your Haute Chocolate Styled Stock Photo directly into your Pinterest board and setting it as the board cover. (trusting it to display the photo for you)
If you go this route, go to the board you wish to change the cover of and at the top right you will see the option to upload an image. Click that.
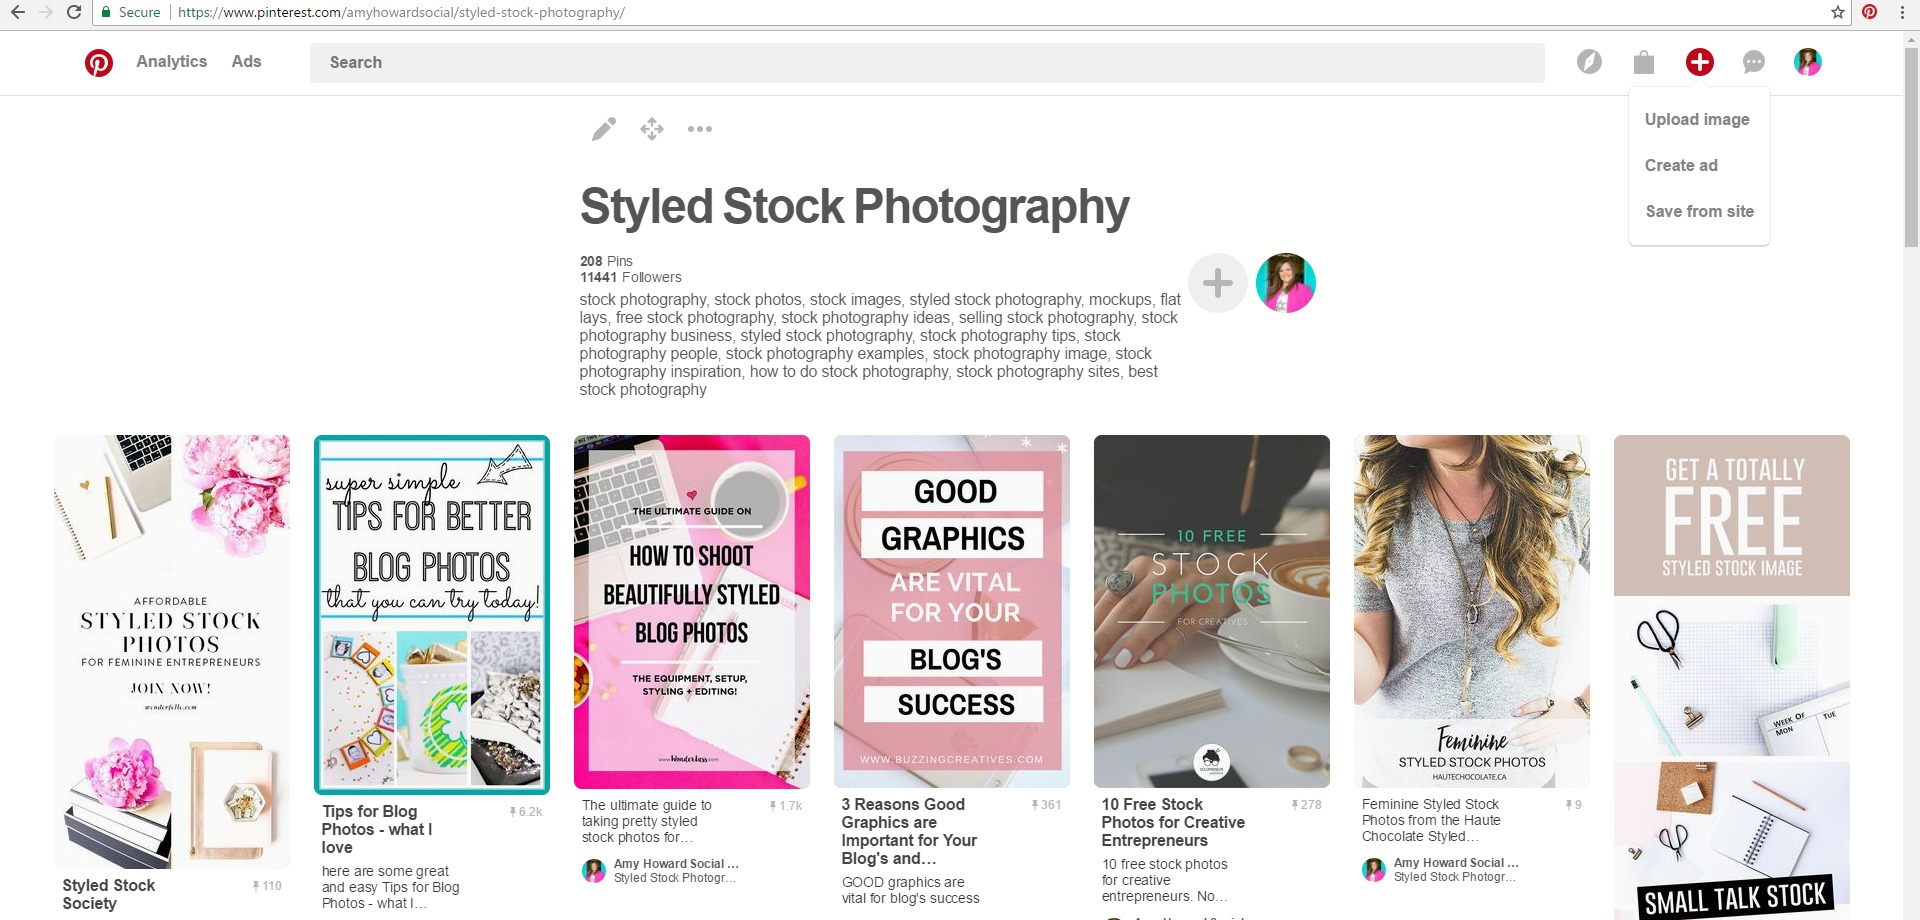
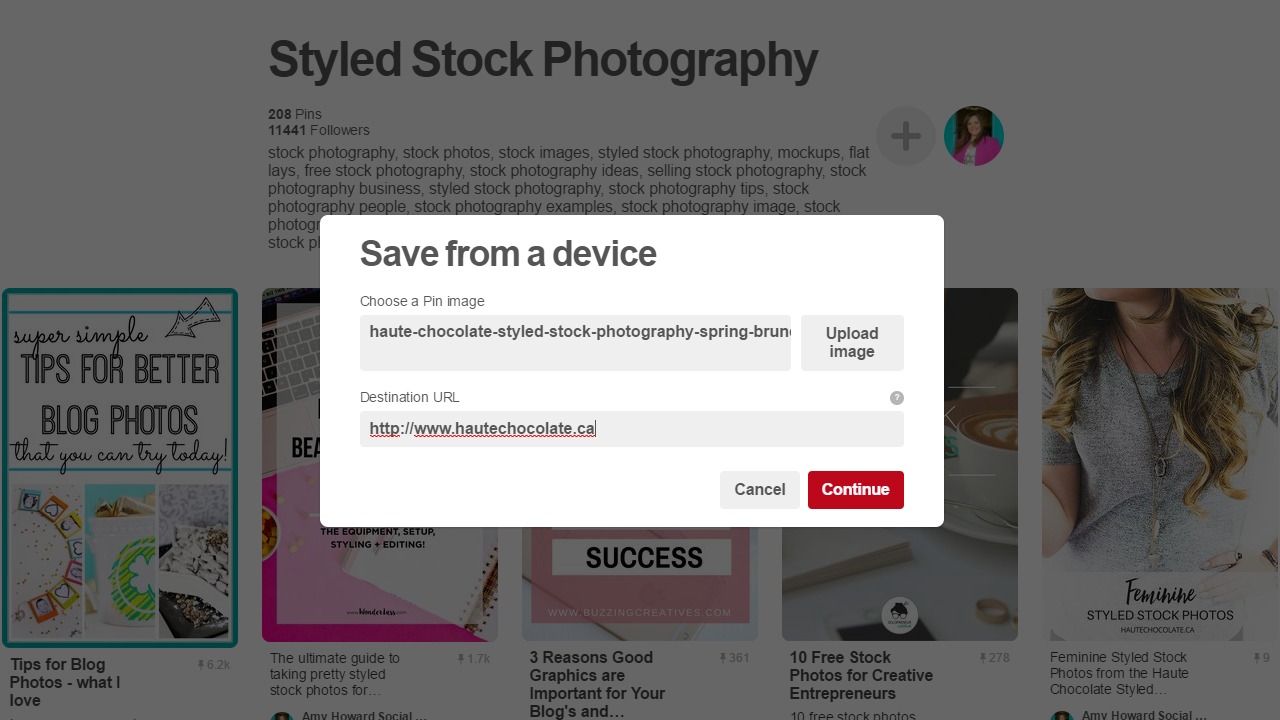
Then, you will be able to choose your photo and you will be able to link that photo to somewhere. Preferably, you can link it to your blog – I always like to give Haute Chocolate credit, so perhaps you could link to your blog, but in the pin’s description give Rachel credit at Haute Chocolate.
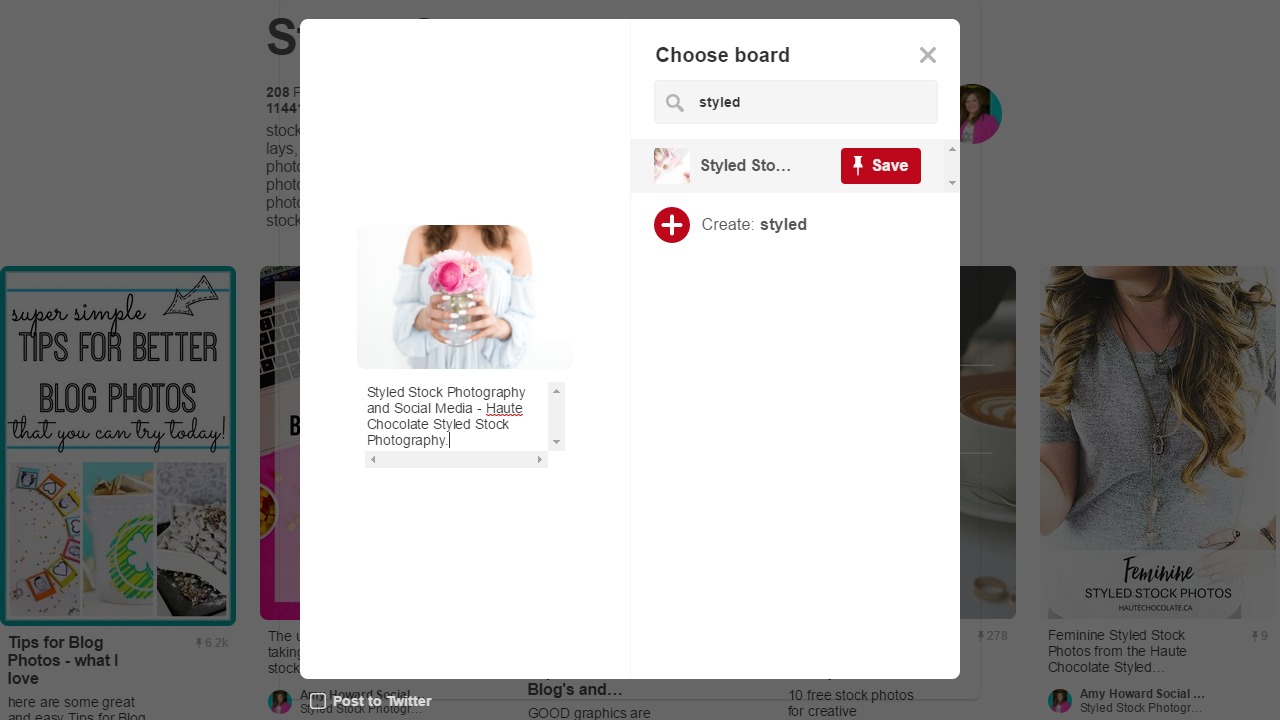
Next, you will want to view your new pin and edit it’s description and choose the appropriate board that you wish to pin it to.
Next, go to your Pinterest account and click edit on the board you just uploaded your styled stock photo to.
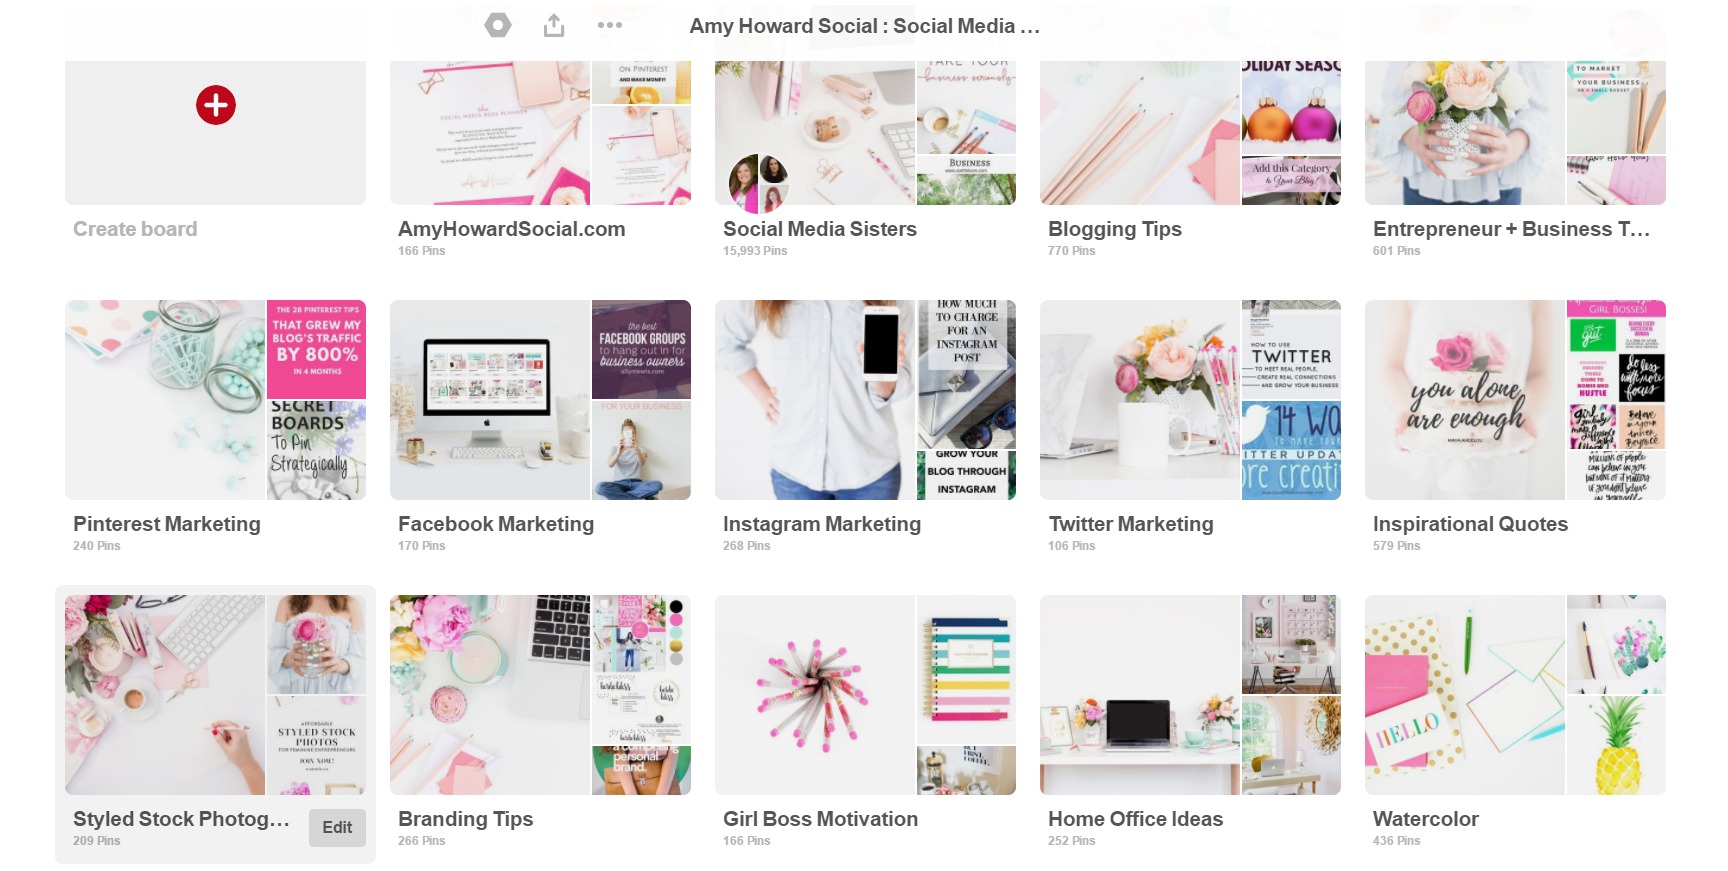
After you click the edit button, click on the change button beside cover.
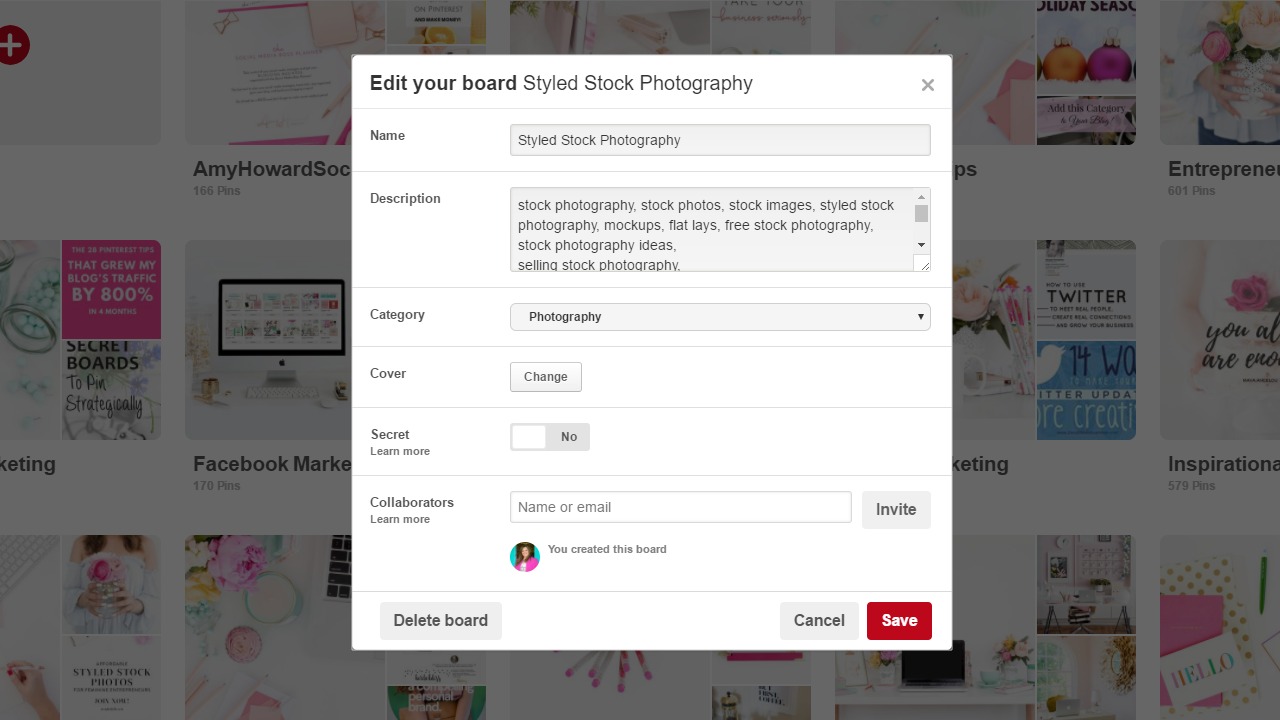
And then you choose the photo that you just uploaded and save your changes. Easy peasy!

Option 2: Going into PicMonkey and create an image at the size of 340 x 340 – then follow the above directions for uploading to Pinterest. By going this route, you can decide exactly what your board cover will look like and if you want to add any text, this is the option for you.
So, that’s it and it’s that easy! Tell me, are you going to update your Pinterest board covers with stock photography? If you decide to, I can’t express how much I love Haute Chocolate – it’s my go-to for feminine, affordable stock photography. You can read more about the styled stock library, here.
Cheers to pretty Pinterest board covers!
DON’T FORGET IT : PIN IT!



Wow this is super easy. Thanks!
Hi Amy,
Thanks for sharing the tool PicMonkey, it’s the first I heard that tool. It looks very easy to use and has a lot of great features for my pins.
Valerie